Scratch Resources
Scratch Projects


Show summary ▾ In this Scratch project, I've created a fun way to make battle royale games more challenging by adding a feature that selects a random position to drop on the map. First, I uploaded an image of the map as a backdrop. Then, I added code to broadcast a message called "new location" whenever the stage is clicked. Next, I programmed an arrow sprite to move to a random location and point in a random direction when it receives the "new location" message. Now, whenever you click on the map, it will randomly select a new location for you to drop into the game.

Show summary ▾ In this Scratch tutorial, you'll learn how to make music with funny faces! We start by creating a new project, adding a blank backdrop, and adding a few funny face images. You'll see how to add sounds from the Sounds tab and code them to play when keys are pressed, making music with your keyboard. I demonstrate how to switch backdrops to show funny faces with sound. We'll also cover fixing a common bug where quickly pressing keys can cause interruptions. Finally, you'll learn to create a beat or melody by adding rests and using repeat blocks.

Show summary ▾ In this video, you'll learn how to create a fun prank in Scratch with a fake slideshow that features a spooky surprise! We'll start by deleting the Scratch Cat and adding a spooky sprite. Then, we'll code the slideshow to switch backdrops every few seconds when the green flag is clicked. For the surprise, we'll hide the ghost sprite at first, then show it with a spooky sound. To make the surprise even more interesting, we'll use a "pick random" block to randomize the timing. Check out the demo and explore more Scratch content on my channel to enhance your computer science skills!
Scratch Tips
Simple tips

Show summary ▾ Unlock the full potential of block-based coding with this comprehensive collection of Scratch tutorials designed to help you learn Scratch programming and effectively teach Scratch coding to students of all levels. Whether you are searching for foundational Scratch tips and tricks or more advanced game development techniques, this video series covers essential project management skills like transferring code between projects, saving offline files, and designing custom thumbnails. Viewers will dive deep into manipulating Scratch sprites through custom animations, interactive dragging functions, and resetting behaviors, while also mastering complex Scratch blocks such as Operators, Sensing, Pen, and Video Sensing. Furthermore, these step-by-step coding guides provide clear instructions on utilizing Scratch variables to build highly requested game mechanics like countdown timers, digital clocks, and cloud-based high score tracking, making it an ultimate resource for educators and creators looking to elevate their interactive computer science projects.

Show summary ▾ When you create a project in Scratch, it's important to think about all the different people who might use it. You don't want to accidentally leave anyone out! For example, if your project has text, how can someone who can't read still enjoy it? One solution is to add audio tracks that describe what's happening in each scene. Users can press a key to hear the narration. There are many ways to make projects more accessible. How would you change a game so someone with one hand can play? What about a game for someone who can't hear? Adding different difficulty levels can make your game fun for more people. When you're creating in Scratch, think about who might have trouble using your project. Find creative ways to make your project accessible to everyone.

Show summary ▾ Learn how to add a GIF to your Scratch project! To add a GIF, select "Upload Backdrop" or "Upload Sprite" in the bottom corner of the screen. Choose a GIF saved on your computer and click "Open." In the costumes tab, you should see a sprite with many different costumes because a GIF is like a really fast slideshow of pictures. If you only see one costume, you don't have a GIF. To animate your GIF, select an events block and a repeat block like "Repeat Forever." Place a "Next Costume" block inside your repeat block and run the event. Add a "Wait" block in the repeat block and change it to a number that's less than one second, like 0.1 or 0.5, to slow down the GIF. Add a "Switch Costume" block before your repeat block to make your GIF start at the beginning.

Show summary ▾ In Scratch, you can add comments to your code to explain how it works or to remind yourself of things you need to do. Here's how: Right-click anywhere in the code area. Select "Add comment." Type your comment in the sticky note that appears. Resize the comment as needed by dragging the corner. Comments can be attached to specific blocks, so they stay with the block even if you move it around. You can also expand or collapse comments by clicking the corner of the comment. Comments are not only useful for understanding your own code but also for others who might remix your project or for teachers who want to assess your work. They can help you keep track of what your code does and what you need to work on in the future.

Show summary ▾ In Scratch, you can easily add images from your computer to your projects. Simply save an image you like on your device. Then, while editing your project, look for the "Upload Backdrop" or "Upload Sprite" button in the bottom corner of the screen. You can also find this button in the costumes tab when adding a new costume. Select the image file you saved on your computer and click "Open" to add it to your project. It's important to credit the source of your images. You can do this by adding a note in the "Notes and Credits" section of your project page. This helps acknowledge the original creators of the images you use.

Show summary ▾ To change the block language in Scratch, click on the gear icon in the top corner of the screen, then select the globe icon, and choose a language. Some languages, like Japanese, offer multiple options such as kanji and hiragana. For languages like Arabic, the stage may flip to the other side of the screen, but it won't affect your code. You can switch back to your preferred language by selecting it from the options in the corner of the screen.
Show summary ▾ Learn how to code a button in Scratch! When creating a button in Scratch to change the color of a character like Scratch Cat, you may encounter a common issue where clicking the button changes the button's color instead. To solve this, you can use broadcast and receive messages. First, create a message called "change color." When the button is clicked, broadcast this message. Then, use the "when I receive" block in Scratch Cat's code to change its color when it receives the "change color" message. Repeat this process for multiple buttons with their unique messages for Scratch Cat to change colors.

Show summary ▾ Check out this step-by-step tutorial on how to move sounds, sprites, code, and more to a different Scratch project! In this video, you'll learn how to: Sign into Scratch and open a project. Use the backpack to store and transfer items. Move items from the backpack to a new project. Delete items from the backpack. Properly credit your sources in your project.

Show summary ▾ Learn how to make your Sprites draggable in full-screen mode in Scratch! You may have noticed that when you're working on your code in Scratch, you can drag the Sprites around on the stage but not in full screen. We can change that with a sensing block called "set drag mode draggable." Simply attach the block to an events block and then run your code. You'll notice that you can now drag the sprite in full-screen mode. To make other Sprites draggable in full-screen mode, simply copy this code by dropping it on the other Sprites and running your code again. If you want to turn off the ability to drag a Sprite in full-screen mode, attach a "set draggable mode not draggable" block to an events block and run your code again.
Show summary ▾ Have you ever looked at another Scratch project and thought, 'This is great, but it could be even better with some changes'? You can customize other people's Scratch projects by signing into Scratch, opening a project you'd like to change, and then pressing the remix button at the top of the screen. This action creates your own copy of the project that you can modify without worrying about changing the original creator's project. When making changes, remember that you can always find the original project on your project page if you want to look at the code in the original. Don't forget to thank the original creator in the notes and credits.

Show summary ▾ In Scratch, you can easily record sounds to use in your projects. Open the Sounds tab and hover over the button in the bottom corner of the screen. Click the microphone button to start recording, and allow your browser to use the microphone. Pay attention to the audio meter with green, yellow, and red bars; green might mean your audio is too quiet, yellow is good but might be a little loud, and red is too loud, which will make your audio sound bad. Use the bars on either side of the recording to trim the start and end points, then press play to listen to it, re-record it, or press save. There are many buttons you can use to customize your recording, but I talk about that in another video in my Scratch playlists.

Show summary ▾ Learn how to remove the background from bitmap costumes in Scratch! When you import a new bitmap costume in Scratch, you may notice that it has a background that covers up the rest of your project. Here's how you can remove it: If the background of the costume is one solid color, use the Fill tool. Select the color menu, then select the red slash for delete. Click the solid color in your background, and it should erase your backdrop. If you don't have a solid color behind your sprite or it leaves little specs behind, use the Select tool. Highlight large chunks and then press delete. Once you have the majority of the background deleted, zoom in on your sprite. Select the Eraser tool and then erase the outside edges of your sprite. You can press the back arrow if you make a mistake and change the size of your eraser at the top of your screen to make it smaller or larger.

Show summary ▾ Discover how to reset your sprite in Scratch! Have you ever created a Scratch project that changes a sprite around, only to realize you don't know how to reset it? Here are some tips: Reset pitch and panning effects for sound using a "clear sound effects" block. Reset visual effects using a "clear graphic effects" block. If your sprite's size is off, use a "set size to 100%" block to fix it. If your sprite is pointing in the wrong direction, use a "point in direction" block to reset it. Use a "go to XY" block to reset where the sprite starts. Set it to (0, 0) to reset to the middle of the stage. Attach any of these blocks to a message, such as "reset the sprite," and broadcast that message when needed (e.g., when the green flag is clicked, a key is pressed, or a reset button is clicked).
Show summary ▾ You can save your Scratch projects on your computer by following a few simple steps. First, go to the "File" menu and click on "Save to your computer." Choose a location on your computer to save the file. This file can now be opened in the offline Scratch editor, which you can download from the link in the video's description or on Scratch's website. To open your saved project, open a new project in the offline editor, go to the "File" menu, and click on "Load from your computer."
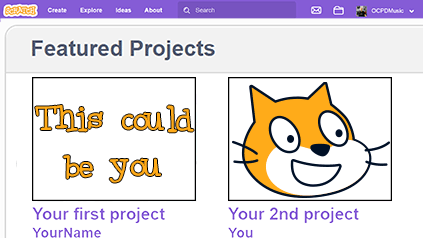
Show summary ▾ Sharing your Scratch projects is a great way to showcase your work! Here's how you can do it: Sign in to Scratch and open the project you'd like to share. Click on the orange "Share" button at the top of the screen. Add a fun and descriptive title for your project. Include detailed instructions or notes about the project, and give credit to anyone who helped you. If you want to organize your projects, open the "My Stuff" folder and create a studio for your projects. You can add your project to this studio. To unshare a project, simply click the "Unshare" button in the "My Stuff" folder.

Show summary ▾ Learn how to easily flip a vector sprite in Scratch! If you want your vector sprite to face the other direction, follow these simple steps: Open the costumes tab for the sprite you want to turn around. Use the Fill tool to make parts of the sprite disappear. Select the Fill tool, then click on the color you want to fill with, and click on the parts you want to hide. For more complex sprites, like ones with hands and feet facing forward, use the Select tool. Click the ungroup button, then click on individual parts of the sprite you want to flip. Move them to the front or back of the sprite to make it look like it's facing the other direction.

Show summary ▾ In Scratch, you can turn on high contrast mode to make it easier for some people to read the text. To do this, go to Settings, then Color Mode, and click on High Contrast. If you want to switch back to the original view, simply go to Settings, then Color Mode, and click on Original.

Show summary ▾ Have you ever wondered how to draw and edit images in Scratch? In this video, we'll explore the different tools and features available for creating and editing costumes and backdrops. When you open a costume or backdrop in Scratch and see the "Convert to Vector" button, you're working with a bitmap image. Here's what you can do with the drawing tools: Brush Tool: Use this tool to draw new shapes like you would with a brush or pencil. You can change the size of the brush at the top of the screen. Line Tool: Draw straight lines by clicking and dragging. Adjust the size and color of the line at the top. Circle Tool: Draw ovals and circles, filled or just an outline. Hold Shift for a perfect circle or Alt/Option for a circle with the center where you click. Rectangle Tool: Similar to the Circle Tool, create filled or unfilled rectangles. Hold Shift for a perfect square or Alt/Option for a rectangle with the center where you click. Text Tool: Add text by clicking, typing, changing the font, and then dragging and resizing as needed. Fill Tool: Change the color of different parts of your image. Hold Shift to replace all instances of that color. Gradient Tool: Blend two colors using one of the three gradients at the top of the Color Picker. Eraser Tool: Erase parts of the image. Change the size and zoom in or out for precision. Select Tool: Select an area of the image and move or rotate it. Resize by grabbing the corners or edges of the box. Layers: Use the tools at the top to undo and redo changes, flip the orientation, or copy and paste selections. Remember, if you convert a vector image into a bitmap, you'll lose the ability to convert it back without losing quality. So, it's best to keep vector images as vectors if you want to maintain the original quality and layers.

Show summary ▾ In this video, we explore the powerful tools available in Scratch for working with vector images. We'll learn how to manipulate shapes and curves to create unique images that look clear at any size. Let's dive in! If you open up a costume or backdrop in Scratch and see the "Convert to Bitmap" button at the bottom of the screen, you know you're working with a vector image. Vector images are made up of layers of shapes or curves that can be manipulated to create unique images that look clear at any size. But some of these tools can be confusing at first. The Select Tool allows you to select one or more parts of an image and move them around. You can also rotate the layers by grabbing the arrows at the bottom of the highlighted box. Holding shift while rotating will snap the image to 45-degree turns. You can resize parts of a vector by grabbing the corner or edges of a box, and holding shift when dragging to turn off maintaining the aspect ratio. The Reshape Tool allows you to add, remove, or move points of your image to change the shape of different parts. You can even change the edges to curved or pointed shapes. Holding shift allows you to select multiple points to change them simultaneously. The Brush Tool lets you draw new shapes like you would with a brush or pencil. You can change the size of the brush at the top of the screen. After using the brush tool, you can change what you drew using other tools like the Reshape Tool. The Eraser Tool allows you to erase different parts of the vector. Like the brush tool, you can change the size of the eraser and even zoom in or out to make it easier to erase something. The Fill Tool lets you change the color of different parts of your image. Simply select the color and click on the image to change from one color to another. These tools, along with others like the Text Tool, Line Tool, Circle Tool, and Rectangle Tool, allow you to create intricate and detailed vector images in Scratch. Remember, if you convert a bitmap image into a vector, it gives you the tools of a vector image, but you may lose some layers and groups. So, it's best to start with a vector image to use all the vector tools effectively.

Show summary ▾ Learn how to amaze your friends with a fun trick in Scratch! In this project, you can blow out candles on a cake without touching your keyboard or mouse. Simply create two costumes for your cake sprite: one with the candles lit and another with the candles blown out. When you press the green flag, switch to the lit costume. Then, using the 'when loudness' block, switch to the blown-out costume when you make a loud sound into the microphone. Impress your friends by blowing into the microphone to blow out the candles!

Show summary ▾ In this example, the left and right algorithms might look the same, but they behave differently! The left code plays a groove two times, while the right code only makes one beat. Why? Well, the "play sound until done" block on the left won't move to the next block until the entire sound has finished playing, whether it's short or long. But the code on the right will start the sound with the code underneath it. Because this "repeat" block is all "start sound" blocks, it's actually repeating so fast that it sounds like one single sound, even if we repeat it 200 times! You can attach a "start sound" block on top of a "play sound until done" block to play two or more sounds before moving on to the next block.

Show summary ▾ If you can see your Sprite in the Sprite pane but not on the stage in Scratch, there are a couple of things you can do to fix it. First, your Sprite might have moved off the stage, so you can bring them back to the center by setting their X and Y coordinates to 0. If that doesn't work, the issue might be a visual effect. Try a combination of showing the Sprite, bringing it to the front, clearing any graphic effects, or resetting its size to make your Sprite reappear.
Intermediate tips
Show summary ▾ Unlock the full potential of block-based coding with this comprehensive collection of Scratch tutorials designed to help you learn Scratch programming and effectively teach Scratch coding to students of all levels. Whether you are searching for foundational Scratch tips and tricks or more advanced game development techniques, this video series covers essential project management skills like transferring code between projects, saving offline files, and designing custom thumbnails. Viewers will dive deep into manipulating Scratch sprites through custom animations, interactive dragging functions, and resetting behaviors, while also mastering complex Scratch blocks such as Operators, Sensing, Pen, and Video Sensing. Furthermore, these step-by-step coding guides provide clear instructions on utilizing Scratch variables to build highly requested game mechanics like countdown timers, digital clocks, and cloud-based high score tracking, making it an ultimate resource for educators and creators looking to elevate their interactive computer science projects.
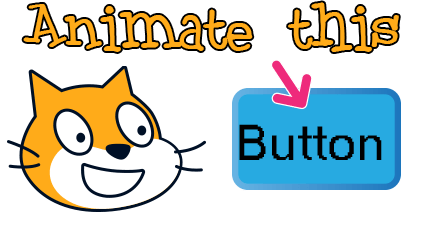
Show summary ▾ In this video, we're going to enhance a button in Scratch to make it more interactive and responsive. Let's get started! When we press the button, it changes the color of Scratch Cat, but it's hard to tell when the button is actually being pressed. To make it more obvious, we can add a popping sound to play when the button is pressed. This provides auditory feedback, letting us know that the button press has been registered. Next, we can make the button visually respond to being pressed. We can do this by adding a repeat block that lowers the size of the button by a small amount, and then another repeat block that increases the size back to its original size. This creates a "pressing down and back up" effect, making the button feel more interactive. To add a bit more flair, we can also adjust the color of the button slightly when it's pressed. We can do this by adding a number to the color effect in one of the repeat blocks, and subtracting the same number in the other repeat block. This creates a subtle color change when the button is pressed, adding to the interactive feel. However, you may have noticed that if you click the button too quickly, it slowly shrinks and changes colors. We can fix this issue by resetting the size and clearing the graphic effects before the repeats. This ensures that the button returns to its original state before each press, preventing any unintended changes. By implementing these changes, we can make our button more engaging and responsive, enhancing the overall user experience.

Show summary ▾ To easily translate your Scratch project into nearly any language available on Scratch, first open the 'Add Extensions' tab in the bottom corner of the screen and click 'Translate.' Now, replace any text bubbles you have with the translate block to translate to a specific language like Spanish. If you want to translate to nearly any language available on Scratch, put the language oval inside of the language dropdown. If someone switches the block language to one of the languages in the translate options, it will now translate the text to that language. If you go back to the extension and click 'Text to Speech,' you can use these blocks to hear what a translation would sound like if spoken. Just make sure to set the language to the correct language before speaking.

Show summary ▾ Learn how to display the time in Scratch! Create a variable called "time" and put it inside a forever loop attached to a green flag. To display the hour, drag in the "current hour" block. For the minutes, use join blocks to combine the hour with the minutes, adding a colon between them to avoid blending the numbers. To display the seconds, repeat the process with the "current second" block. Double-click or right-click on the variable on the stage to change how it looks in your project.
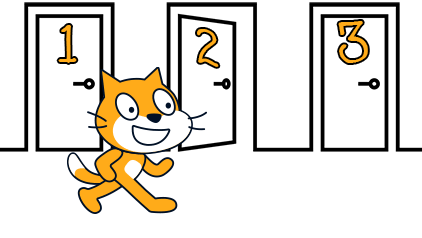
Show summary ▾ In this project, I've created a simple setup with three different backdrops and three arrows to switch between them. You can use either the mouse to click on the arrows or press the arrow keys on your keyboard to switch between the backdrops. To ensure everything works smoothly, I've set the starting backdrop when the green flag is clicked. Additionally, I've made sure that only the relevant arrows and sprites are shown on each backdrop by hiding them on some backdrops and showing them on others.

Show summary ▾ Explore the world of languages with Scratch! Learn how to create a button that toggles between two audio tracks of your voice speaking different languages. First, create a variable called 'language' and set it to the default language when the green flag is clicked. Next, use an if-else block to check if the language is English. If it is, switch the language variable and the button's costume to Japanese; otherwise, set them to English. In your Sprites with the audio tracks, use an if-else block to play the English track if the variable is set to English, and the Japanese track otherwise. You can expand this idea to toggle between three or more languages by nesting more if-else blocks.
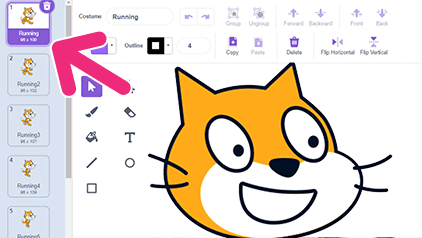
Show summary ▾ You can create custom animations in Scratch using Vector Sprites by duplicating a costume and making a small change, then repeating this process for each frame of the animation. To animate these costumes in your project, set the starting costume, then use a repeat block to quickly switch through the costumes. If you need to slow it down a bit, use a wait block with a decimal. If you have multiple animations, name each set of animations to describe them, then use a broadcast block or make a block for each animation set. Set the starting costume for each animation, then use repeats with a short weight to animate your Sprite.

Show summary ▾ Learn how to create a custom thumbnail in Scratch for your projects! To create a custom thumbnail, follow these steps: Select the paint option for a new sprite in the bottom corner of the screen. Use the rectangle tool to draw a large rectangle around the box in the middle of the costume. Add in sprites that you want on your thumbnail using one of the costume options on the bottom corner of the screen. Click the select tool in the new costume, then click copy. Go back to your custom thumbnail costume and press paste. Resize and move your sprite on your thumbnail as needed. Add a title, then change the font size and angle to make it fit the box in the center. If your thumbnail looks great in the costumes tab but doesn't cover up all of the screen, you can fix that in your code. Add a "go to XY" block and set both X and Y to zero, which is in the center of the screen. Next, add a "go to front layer" block and then a "show" block. Double-click the code, and your new thumbnail should perfectly cover up everything in your project.

Show summary ▾ Discover how to save and display high scores in your Scratch game! Did you know that you could save scores in Scratch to make players compete for the highest score in your game? For example, you can create a high score for the longest time someone was able to play a simple jumping game where you have to jump at least once per second, or the game stops. To save a score across accounts, you'll need to use a special variable called a cloud variable. First, you need to accept to become a Scratcher and sign into Scratch with that account. To learn more about how to become a Scratcher, see the link in the description. Then, make a variable and check the cloud variable box before you press OK. You'll know it's worked if you have a variable that has a cloud next to it. Next, use the high score variable to set the highest score in your game. Instead of setting the high score to zero when you start your game, add an if block when the game ends to check if anyone playing the game has a timer that is higher than the high score variable. If they do, set the high score variable to the timer variable and stop the game. Don't forget to show the high score variable when the game ends and hide it when it starts. Now, whenever someone plays the game, it will update the longest time variable whenever someone sets a new high score, but it won't change the variable if they don't beat the high score.
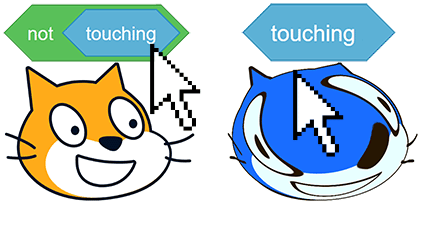
Show summary ▾ Learn how to interact with sprites using your mouse in Scratch! Attach a forever loop to a green flag events block and put an if-else block inside this loop. If the mouse is touching the sprite, you can change the way the sprite looks. Otherwise, clear the graphic effects to reset the sprite back to normal.

Show summary ▾ Learn how to make your Scratch game start only when you press a button! When you press the green flag, the player can start moving around. However, to make the game start only when you press a start button, you can use code to broadcast a message called "start" when a user clicks the start button sprite in your player sprite. Then, move your player control to a new event called "when I receive start." This way, the game won't start until you press the button. To make the start button hide when the user clicks it and show when they click the green flag, and do the opposite for the player sprite, you can add code to hide and show the sprites accordingly.

Show summary ▾ Learn how to create a countdown timer in Scratch! First, open the Variables tab and create a new variable named "timer." Choose whether it's for one sprite or all sprites, then click OK. This will create a new timer variable in the Variables tab. Select an event block to start the timer, then attach a "set variable" block to set the timer variable to 5 (for a five-second timer). Add a "repeat until" block inside this block, with a "less than" operator comparing the timer variable to one. Inside the "repeat until" block, add a "wait one second" block and change the timer variable by -1. This will make the timer count down until it reaches zero. You can add code at the end to stop all other code or broadcast a message like "game over" when the timer reaches zero.
Show summary ▾ In Scratch, you can create transition screens to show the passing of time or to add special effects to your projects. Here's how you can do it: Create a Cover Sprite: Start by creating a new Sprite that covers the entire screen. This will be your transition screen. Adjust Sprite Position: Use a "Go to XY" block to position the cover Sprite at the center of the screen (X: 0, Y: 0). Hide the Sprite: Initially, hide the transition screen Sprite so it's not visible when the project starts. Create Fade In Function: Define a function called "Fade In" where you set the ghost effect of the transition screen Sprite to 100 (invisible), bring it to the front layer, and then use a "Repeat" block with a negative value to gradually reduce the ghost effect, making the Sprite fade in. Create Fade Out Function: Similarly, create a function called "Fade Out" where you use a "Repeat" block to gradually increase the ghost effect of the transition screen Sprite, making it fade out. Finally, hide the Sprite. Use Broadcasts to Control the Transition: To trigger the transition, broadcast the "Fade In" message and wait for a few seconds. Then, change the background or perform any other actions you want to show during the transition. After that, broadcast the "Fade Out" message to fade out the transition screen. Use "Wait" Blocks for Synchronization: To ensure that the next block of code does not run until the transition is complete, use "Wait" blocks after broadcasting the "Fade In" and "Fade Out" messages. Testing and Refinement: Test your project to see how the transition screens look. You can adjust the timing of the fade in and fade out effects by changing the value in the "Repeat" blocks. Adding transition screens can make your Scratch projects more dynamic and engaging.
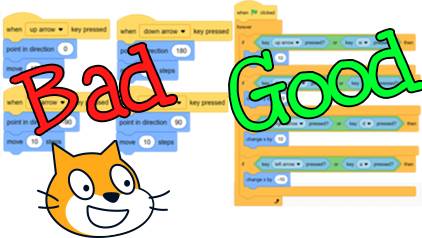
Show summary ▾ In Scratch, you can make your Sprite move smoothly in response to arrow key presses. Here's how: instead of directly moving the Sprite with the arrow keys, use the "change X" block to move left and right, and the "change Y" block to move up and down. By putting these blocks inside an "if key pressed" block for each arrow key, and then inside a "repeat forever" block, you can achieve smooth, lag-free controls that even allow diagonal movement when pressing two arrow keys at once. This not only improves the player's experience but also makes your project more accessible.

Show summary ▾ In Scratch, you can personalize your sound effects with the buttons at the bottom of the screen. The robot button transforms your sound into a robotic sound effect. Try clicking it multiple times and then use the undo arrow to revert the changes. The reverse button plays your sound backward, offering a fun challenge to try speaking backward and then hear the result. The fade-in button gradually increases the volume at the start of the sound, while fade-out decreases it at the end. Adjust the overall volume using the loud or softer buttons. Mute specific parts of the sound using the mute button. Experiment with the faster and slower buttons to change the speed and pitch of your sound. At the top of the screen, you can select and manipulate specific portions of your sound. Use these options to copy, paste, or delete sections of your sound. Remember, you can always undo or redo your changes using the arrows.

Show summary ▾ Learn how to hide and show Sprites in Scratch with these simple steps! If you want to hide all the Sprites in a Scratch project, follow these instructions: Broadcast a message called something like "hide all Sprites" using an events block. Attach a "hide" block to a "when I receive hide all Sprites" block and place these two blocks in every one of your Sprites. To show all the Sprites again, do the following: Attach a "show" block to a "when I receive show all Sprites" block and figure out an event to show all Sprites. If you want to hide every Sprite except the one you clicked on, follow these steps: Swap your "broadcast message" block with a "broadcast and wait" block and add a "when this Sprite is clicked" event. Show the Sprite after it has finished hiding all the other Sprites. You can now make your Sprite say or do something and then show all the Sprites again to bring them back.
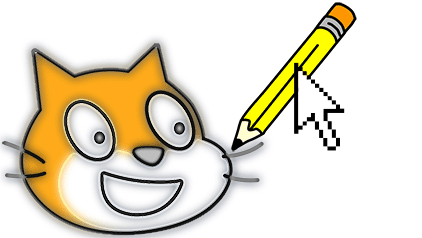
Show summary ▾ In this project, I've created a pencil that follows your mouse and draws whenever you click! First, I added the "Pin" extension to make sure the pencil sticks to the mouse. Then, using the "if else" block, I set it up so that when you click and hold the mouse, the pencil draws, and when you release it, the drawing stops. Additionally, I added a feature to erase everything by pressing the letter "e" or clicking the green flag. To prevent accidental drawing when you press and hold the green flag or a button, I included a "wait until not Mouse down" block right before the forever loop.
Show summary ▾ I've created a button that changes the color of the Scratch Cat when pressed, but I wanted to add a feature where I could press and hold the button to continuously change colors until I let go. To achieve this, I used a 'repeat until' block to broadcast a 'change color' message, and then set the condition to 'not Mouse down.' Now, I can press and hold the button to see the Scratch Cat's color change continuously.

Show summary ▾ In this project, I've added variety to my game's sound effects by randomizing their pitch. Instead of recording multiple versions of each sound, I use a "set pitch" block with a "pick random number" block to vary the pitch slightly each time the sound is played. For convenience, I created a custom block called "randomize the pitch" to easily apply this effect to multiple sound effects. This adds a fun element to the game's audio and keeps things interesting for players.
Show summary ▾ Learn how to make your sprite talk in Scratch! To make your sprite talk, open the costumes tab for the sprite you want to talk. Duplicate a costume and use the select tool to draw a rectangle around the bottom half of the mouth. Drag the selection down and then fill with a color. Name this costume "open mouth" and the other costume "closed mouth." To make the sprite talk forever, switch between the "open mouth" and "closed mouth" costumes. Add a "wait random amount" block after each costume block to make it look more natural. Attach this code to a "when I receive move mouth" message. Then, broadcast a "move mouth" message before your sprite says something. Notice how the sprite keeps talking even when they're done speaking? Once they finish saying something, we need to stop other scripts on the sprite and then switch to the "closed mouth" costume.
Show summary ▾ In this fun Scratch tutorial, you'll learn how to create a music toggle button using a button sprite with two costumes. When you click the button, it will start playing music, and clicking it again will turn off the music. First, create a button sprite with two costumes named "on" and "off". When the green flag is clicked, switch the costume to "off" and stop all sounds. When the button is clicked, check if the costume name is "on". If it is, switch the costume to "off", stop all sounds, and if it's not, switch the costume to "on" and broadcast a "loop music" message. Create another sprite with the music you want to play. When it receives the "loop music" message, use a forever loop to play the sound until done. Now you can toggle the music on and off by clicking the button!

Show summary ▾ In this project, ScratchCat narrates their day, accompanied by unique sprites for each backdrop. I've used the "when backdrop switches to" block to control which sprites appear on each backdrop. This keeps my code organized and prevents it from becoming too complex. By using the "switch backdrop to" block, I can smoothly transition between scenes in my story.

Show summary ▾ In this video, I've created a fun clicker game where you earn points by clicking on random animals. However, I wanted to make the game more engaging by adding unique sounds for each animal when clicked. Instead of adding multiple sprites with their own sound effects, which could be tedious to manage, I used a clever trick in Scratch! By dropping a "Costume Number" block inside the "Start Sound" block, I made the game play a sound that matches the clicked animal's costume number. This way, each animal has its own distinct sound, adding a new level of excitement and fun to the game.
Advanced tips
Show summary ▾ Unlock the full potential of block-based coding with this comprehensive collection of Scratch tutorials designed to help you learn Scratch programming and effectively teach Scratch coding to students of all levels. Whether you are searching for foundational Scratch tips and tricks or more advanced game development techniques, this video series covers essential project management skills like transferring code between projects, saving offline files, and designing custom thumbnails. Viewers will dive deep into manipulating Scratch sprites through custom animations, interactive dragging functions, and resetting behaviors, while also mastering complex Scratch blocks such as Operators, Sensing, Pen, and Video Sensing. Furthermore, these step-by-step coding guides provide clear instructions on utilizing Scratch variables to build highly requested game mechanics like countdown timers, digital clocks, and cloud-based high score tracking, making it an ultimate resource for educators and creators looking to elevate their interactive computer science projects.
Show summary ▾ An interesting challenge you can try with nearly any Scratch project is to recreate it without looking at the code. For example, you can reverse engineer the player controls for a maze game by thinking through which keys cause the player to move and then figuring out how to recreate something similar with code. Break down the project into different functions or chunks and try to recreate them in a new project. If you get stuck, you can peek inside the project for hints, but make sure to thank the original creator in the notes and credits. Challenge yourself to reverse engineer a project today!
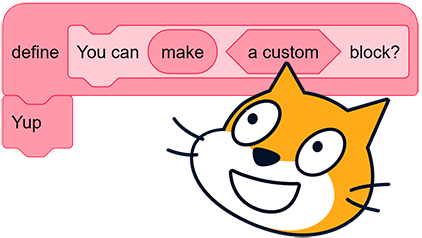
Show summary ▾ In Scratch, you can create custom blocks to make your coding more efficient and organized. By clicking on "My Blocks" and then "Make a Block," you can define blocks with unique names that describe their purpose. These custom blocks can have inputs, like numbers or text, to make them more flexible. For example, if you want a function to draw random squares on the screen, you can create a block that takes a number input for the number of squares to draw. You can also add labels to your custom blocks to make them easier to understand. Right-click on a custom block and select "Edit" to add labels or inputs. If you need to remove a label or input, simply click the trash can icon above it. Another type of input you can use is a Boolean, which is true or false. These inputs are represented by blocks with the same shape as what you see on the screen. One useful option in custom blocks is the "Run without screen refresh" checkbox. This makes the code in that block run very quickly, which can be helpful in games or pen projects where you want things to happen instantly.
Show summary ▾ In your project with multiple game modes, create two or more buttons and a title screen that shows when the green flag is clicked. Create a new variable named something like "game mode." When each of the buttons is clicked, set the new variable to that game mode. For example, set the game mode to "animals" when the animals button is clicked, and "fantasy" when the fantasy button is clicked. If you have a unique backdrop for each game mode, switch to the correct backdrop when each button is clicked. Next, broadcast a message called something like "start the game," then hide each of the buttons when the game starts. In your Sprites' code, create a new block called something like "check game mode," and make it so your Sprites will match each of the game modes you have. For example, if the game mode is "animals," display the first 5 Animal Sprites; otherwise, show the fantasy Sprites 6 through 10. If you have three or more buttons in Scratch, nest more if-else conditionals inside of your "check game mode" block for each one of the options.

Show summary ▾ In Scratch, you can create your own music player controls without needing any Sprites! Here's how: First, add the songs you want to loop using one of the options in the bottom corner of the Sounds tab. Then, create a variable, naming it something like "song number," and set it to 1 when the green flag is pressed to start on the first song. Next, create a new broadcast message and name it something like "play." Attach this block to an event like the green flag or when a key is pressed to give users different options for starting the music. You can choose to play the song forever, once, or even loop it for a set number of times. When you receive the "play" message, remember to use the "play sound until done" block to avoid any weird glitches with the "start sound" block. Insert your song number variable inside the "play song until done" block to easily switch songs with your variable. If the song doesn't repeat forever, you can switch to a new song using a message like "broadcast next song." When you receive the "next song" message, change the song number by one and then broadcast "play" again. Make sure to add a "stop all sounds" block before playing the new song to prevent two songs from playing simultaneously. To switch to the previous song, change the song number by -1 and broadcast "play" when a button or key is pressed by the user. You can also stop the music by attaching a "stop all sounds" block to a message like "when I receive stop" and broadcasting that message with an events block.

Show summary ▾ In Scratch, there's a block that can stop all sounds, but how do you pause a sound or music and then resume playing where it left off? If you divide negative one by zero, you get Negative Infinity. If we put that inside of a "set pitch" block, it will slow it down so much that it's basically pausing the sound. However, you'll hear a really low sound slowly playing. So, we also want to set the volume to zero when we pause. To unpause, we first check if our volume is set to zero. If it is, we will reset the pitch effect to zero and the volume to something like 100 when clicked, so we can resume the music. Now, we simply put our pause code in the "else" part of the conditional to run this code if our volume is not equal to zero. This button will now pause and resume the music when clicked.
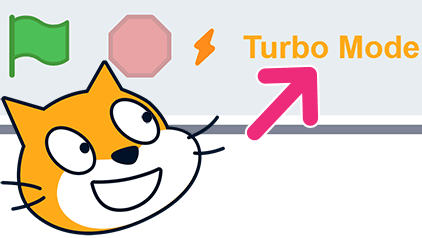
Show summary ▾ Speed up your Scratch projects with Turbo Mode! If your code is taking too long to execute, you can enable Turbo Mode to speed up drawings, games, and other projects with a lot of code running at once. To turn on Turbo Mode, go to "Edit" and click "Turn on Turbo Mode," or hold the "Shift" key when you click on the green flag. However, using Turbo Mode may cause more bugs in your project. If you encounter issues, you can easily turn it off by following the same steps.
How to get (and use) every Scratch block
Show summary ▾ Unlock the full potential of block-based coding with this comprehensive collection of Scratch tutorials designed to help you learn Scratch programming and effectively teach Scratch coding to students of all levels. Whether you are searching for foundational Scratch tips and tricks or more advanced game development techniques, this video series covers essential project management skills like transferring code between projects, saving offline files, and designing custom thumbnails. Viewers will dive deep into manipulating Scratch sprites through custom animations, interactive dragging functions, and resetting behaviors, while also mastering complex Scratch blocks such as Operators, Sensing, Pen, and Video Sensing. Furthermore, these step-by-step coding guides provide clear instructions on utilizing Scratch variables to build highly requested game mechanics like countdown timers, digital clocks, and cloud-based high score tracking, making it an ultimate resource for educators and creators looking to elevate their interactive computer science projects.
Show summary ▾ In Scratch, you can create custom blocks to make your coding more efficient and organized. By clicking on "My Blocks" and then "Make a Block," you can define blocks with unique names that describe their purpose. These custom blocks can have inputs, like numbers or text, to make them more flexible. For example, if you want a function to draw random squares on the screen, you can create a block that takes a number input for the number of squares to draw. You can also add labels to your custom blocks to make them easier to understand. Right-click on a custom block and select "Edit" to add labels or inputs. If you need to remove a label or input, simply click the trash can icon above it. Another type of input you can use is a Boolean, which is true or false. These inputs are represented by blocks with the same shape as what you see on the screen. One useful option in custom blocks is the "Run without screen refresh" checkbox. This makes the code in that block run very quickly, which can be helpful in games or pen projects where you want things to happen instantly.

Show summary ▾ In Scratch, you can use the Makey Makey extension to create interactive projects that respond to keyboard inputs. Here's how you can add and use Makey Makey blocks in Scratch: Open the Extensions Tab: Click on the "Add Extensions" tab in the bottom corner of the screen. Select Makey Makey: From the extensions menu, choose "Makey Makey." Use the "When Keys Are Pressed in Order" Block: This block allows you to create secret combinations, like in a video game, where you need to press keys in a specific order to trigger an action. For example, you can use the famous Konami Code: up, up, down, down, left, right, left, right. Create Your Own Key Combinations: Use the "join" block to create your own key order combinations. Separate each key with a space to make it work correctly. Use the "When Key Pressed" Block: This block allows you to run code whenever a specific key is pressed on the Makey Makey or your keyboard. Experiment with Different Keys: Explore the different keys available on the Makey Makey and try using them in your projects. Remember, some keys may be on the back of the Makey Makey. By using the Makey Makey extension, you can create unique and interactive Scratch projects that respond to keyboard inputs in creative ways.
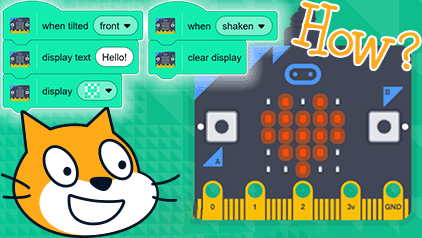
Show summary ▾ To get the micro:bit blocks in Scratch, open the "Add extensions" tab in the bottom corner of the screen and click "micro:bit". The "when button press" block will run code when the A, B, or any button is pressed on the micro:bit. These event blocks are sometimes a little slow, but you can use the "button press" block with an "if" conditional inside of a loop to make it run faster. The "when moved" block has three options for when the micro:bit is moved, shaken, or jumped. Each of these event blocks can make your project do something unique when they occur. The micro:bit has a display that you can program using the display blocks. For example, the "display" block will allow you to click on the LED pixels to draw little pictures, or you can use the "display" block to have text scroll across the LED screen. You can clear the display with a "clear display" block. The "when tilted" event block has the ability to detect when the micro:bit is tilted in any direction - front, back, left, or right. So each option can have its own code. Like the other event blocks, this can have a little delay, but you can use the other "tilt" blocks inside of a forever loop to create player controls that quickly check to see if your micro:bit is tilted and then make a player move in that direction. The "when pin connected" block has 0, 1, and 2 pin options that can each run their own code when connected.

Show summary ▾ In Scratch, you can add music to your projects to enhance the experience for your audience. Here's how you can access and use the music blocks in Scratch: Open the "Add Extensions" Tab: Locate the "Add Extensions" tab in the bottom corner of the screen and click on it. Select the "Music" Extension: After clicking on the "Add Extensions" tab, select the "Music" extension from the options presented. Explore the Music Blocks: Play Drum Block: This block allows you to select different percussion instruments, such as a snare drum or cuica. You can use a "Pick Random Number" block to randomize the percussion instruments played. The variable at the end of the block determines how long the sound will play, with a quarter note equaling one beat. Rest Block: Similar to the drum block in timing, this block doesn't make a sound. It's useful for maintaining the timing of your music without adding a sound. Play Note Block: This block lets you play a note using a MIDI number. By clicking on the number, you can access a piano interface to select the desired note. The "Beats" value determines how long the note will play. Set Instrument Block: Before playing a note, you can use this block to change the instrument. Options include piano, electric guitar, marimba, and more. You can even randomize the instruments with a "Pick Random" block. Set Tempo Block: This block allows you to change the beats per minute (BPM) of your music. For gradual changes in tempo, you can use the "Change Tempo" block in a loop to create a dynamic tempo effect. Experiment and Create: Feel free to experiment with these blocks to create unique and engaging music for your Scratch projects. You can also use mouse coordinates to change which notes are played as the mouse moves.

Show summary ▾ Discover how to use the pen blocks in Scratch to create amazing designs! To get the pen blocks in Scratch, open the "Add Extensions" tab in the bottom corner of the screen and click "Pen." The stamp block will stamp a picture of your sprite on your backdrop wherever it's located. You can use a simple code like this to make some interesting designs. To erase everything you create with the pen blocks, use an "erase all" block. Just make sure to attach it to an event. You can simulate drawing by using a "pen down" block to start drawing and a "pen up" block to stop drawing. For example, put the pen down when you click and put the pen up when you stop clicking. Always remember to use the "pen up" block when you're done drawing, or you'll keep drawing everywhere you move. Use the "set pen color" block to pick a different color. You can also set or change the saturation, brightness, and transparency using the drop-down menu. Saturation is the intensity of the image, so the higher the saturation, the purer the color. Brightness is how light or dark a color will appear. The brighter the image, the lighter it will look. Transparency is how much you can see through a color. If you'd like to adjust the size of your pen, use the "set" and "change pen size" blocks.

Show summary ▾ Learn how to use text-to-speech in Scratch! To get the text-to-speech blocks, open the "Add Extensions" tab in the bottom corner of the screen and click "Text to Speech." The "speak" block will speak out loud the text you type on the right side of the block. If you place a "set voice to" block in front of a "speak" block, you can change the voice to sound higher, lower, or even like a cat! You can combine these blocks to make it sound like a conversation between multiple sprites. To change the accent of the voice, use the "set language to" block before the "speak" block. You can even combine these blocks with a few more to automatically translate and speak nearly any language in Scratch!

Show summary ▾ To easily translate your Scratch project into nearly any language available on Scratch, first open the 'Add Extensions' tab in the bottom corner of the screen and click 'Translate.' Now, replace any text bubbles you have with the translate block to translate to a specific language like Spanish. If you want to translate to nearly any language available on Scratch, put the language oval inside of the language dropdown. If someone switches the block language to one of the languages in the translate options, it will now translate the text to that language. If you go back to the extension and click 'Text to Speech,' you can use these blocks to hear what a translation would sound like if spoken. Just make sure to set the language to the correct language before speaking.

Show summary ▾ Discover the power of video sensing in Scratch! To access the video sensing blocks, open the "Add Extensions" tab in the bottom corner of the screen and click on "Video Sensing." Allow your browser to access your camera, and then drag out a "Video Motion" event block to start the code when the amount of motion is greater than the number on the right. The video block allows you to use the video's motion or direction as a variable in your project. For example, you can make a sprite point and move in the direction you move on camera. Use the "turn video" block to turn the camera on or off, with the option to flip the video if needed. If you want to hide the video while still using video sensing, set the video transparency to a high number like 100 or a low number like zero percent.
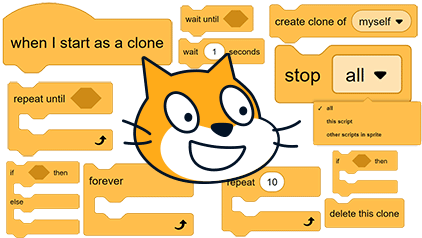
Show summary ▾ In Scratch, you can use a variety of blocks to control the flow of your code. The wait block allows you to pause your script for a specific or random amount of time before proceeding to the next block. If you want to wait until a certain condition is true, you can use the wait until block. The repeat block is used to repeat a set or random number of times. If you want to repeat a block of code forever, you can use the forever block. However, be careful not to attach blocks below the forever block, as they will never be reached. The repeat until block is similar to a forever loop, but it will stop looping once a certain condition is met. This is useful for situations where you want to keep doing something until a specific event occurs. The if block is used to run code only if a certain condition is true. You can also use the if else block to run different code depending on whether the condition is true or false. You can nest if blocks inside each other to create more complex conditions. The stop all block will stop all scripts and is like hitting the red stop sign. If you only want to stop a specific script, you can use the stop this script block. To stop all other scripts in a sprite, you can use the stop other scripts in sprite block. Finally, the create clone and delete clone blocks allow you to create and remove copies of sprites. This is useful for creating multiple instances of a sprite that behave independently. Just remember to hide the original sprite before creating clones, and show each clone when it starts. These are just a few of the many control blocks available in Scratch.

Show summary ▾ In Scratch, every set of code begins with an event block. But what do these blocks actually do? Let's break it down: When Green Flag Clicked: This block runs code when the green flag is clicked, often used to start your project or set up initial conditions. When Key Pressed: Allows you to run code when a specific key on the keyboard is pressed, useful for creating keyboard-controlled games or interactions. When Sprite Clicked/When Stage Clicked: These blocks run code when a specific sprite or the stage is clicked, handy for interactive elements in games or applications. When Backdrop Switches to [Backdrop]: Runs code when the backdrop changes, helpful for changing behaviors based on different scenes in your project. When Loudness: Runs code when the microphone volume reaches a certain level, enabling interactions based on sound input. When Timer: Executes code when a project timer reaches a specified time, useful for time-based events or actions. Broadcast and Receive: Allows different sprites or the stage to communicate and run code in response to messages sent by other parts of the project, enabling complex interactions and coordination. These event blocks are essential for controlling the flow of your Scratch projects and creating interactive experiences. Remember, you can use multiple event blocks together to create more complex behaviors, but be careful not to overcomplicate your project!

Show summary ▾ In your Scratch project, you can use the "say" and "think" blocks to make your Sprite display speech or thought bubbles. These blocks can be set to display text for a specific number of seconds or immediately move to the next block in your code. To stop displaying text, use a blank "say" or "think" block. You can switch costumes or backdrops using these blocks, allowing your Sprite to change its appearance. Additionally, you can gradually change the size of your Sprite or set it to a specific size. Effects like color, fisheye, whirl, pixelate, mosaic, brightness, and ghost can also be applied to your Sprite or stage to alter their appearance. The "clear graphic effects" block resets these effects to their default values. You can show or hide your Sprite, adjust its layer position, and use costume, backdrop, and size as variables in your code. To add randomness to your project, you can use the "pick random number" block or a variable with most of the looks blocks. This allows you to create games where elements like enemies or power-ups appear differently each time without needing to create multiple costumes. Remember, if you can't find certain looks blocks, make sure you're clicked on your Sprite and not the stage.
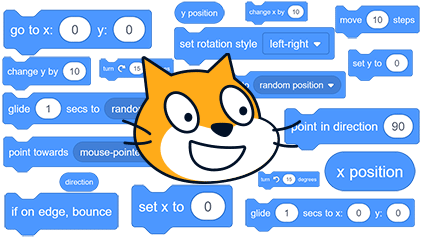
Show summary ▾ In Scratch, the Motion blocks are used to move and rotate Sprites on the screen. The "Move" blocks move a Sprite a certain number of steps in a specified direction. You can also use "Repeat" blocks with the motion blocks to make Sprites move gradually. The "Turn" blocks rotate a Sprite instantly by a specified number of degrees, or you can use a "Repeat" block to rotate it gradually. The "Go to" block allows you to teleport a Sprite to a specific location on the screen, while the "Glide" blocks move a Sprite smoothly to a destination over a specified duration. The "Point" blocks allow you to make a Sprite point towards the mouse or another Sprite. You can use the "Change" and "Set" blocks to move a Sprite relative to its current position, and the "If on edge, bounce" block makes a Sprite bounce when it reaches the edge of the stage. The "Set rotation style" block lets you control how a Sprite rotates. Additionally, you can use the position and direction of a Sprite as variables in your code, and you can display these values on the stage for debugging. If you can't find the Motion blocks, make sure you have selected a Sprite and not the stage.
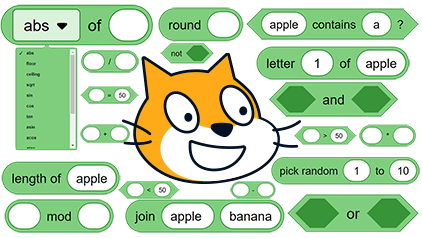
Show summary ▾ Discover the power of mathematical and logical blocks in Scratch! With these blocks, you can perform basic arithmetic operations like addition, subtraction, multiplication, and division. Combine them to create more complex equations. For example, use them to pick a random number for a game feature or to compare values using greater than, less than, and equal blocks. Explore the world of Boolean logic with blocks like "and," "or," and "not," which return true or false based on conditions. Use them to control when certain actions should occur, like repeating a task until a condition is met. Join blocks allow you to combine words, variables, or equations into a single string of text. You can even use them to create a clock by stacking multiple join blocks together. Other useful blocks include those for detecting specific letters or characters in text, performing modulo operations, rounding numbers, and manipulating mathematical functions like sine, cosine, and square root.

Show summary ▾ Explore the power of sensing blocks in Scratch! The "touching" block can be used to trigger code when a sprite touches the mouse, another sprite, or even the edge of the stage. For example, you can delete a clone when it reaches the edge of the screen or detect if your sprite is touching specific colors, like the color of a wall or goal in a maze game. The "distance to" block checks the distance to your mouse or another sprite, which is useful for movement in games. You can create quizzes by checking if the user gets the correct answer, and use variables or lists to store multiple answers. Key press blocks check if a key has been pressed, while the mouse down block checks if the mouse is clicking. You can use the mouse X and Y blocks to control different parts of your code, like making a sprite follow your mouse horizontally. The "loudness" block can detect microphone loudness if you allow Scratch to use your microphone. The "green flag" resets a timer in Scratch, and you can use the "reset timer" block to reset the timer without clicking the flag. You can also use these blocks to detect the current date and time in your project, or use the "day since 2000" block to count the days since January 1st, 2000. The "username" block displays the username of a logged-in user when they use your project, which can be used to personalize the user experience. If you're missing sensing blocks, make sure you're clicked on the sprite where the blocks are located.

Show summary ▾ In Scratch, you can control how sounds play and interact with each other in your projects. The "play sound until done" block ensures that the entire sound plays before moving to the next block, while the "start sound" block allows you to start multiple sounds simultaneously. If you need to stop all sounds, you can use the "stop all sounds" block, but note that restarting a sound will start it from the beginning. To modify the pitch of a sound, use the "change pitch" or "set pitch" blocks. A negative number slows down the sound and lowers the pitch, while a positive number speeds it up and raises the pitch. Panning controls the direction of the sound in stereo, with -100 sending it left, 100 sending it right, and 0 balancing it between both speakers. The "clear sound effects" block resets any pitch or panning changes, and the volume blocks adjust the sound's loudness. You can even use volume as a variable to dynamically change aspects of your project based on sound levels.
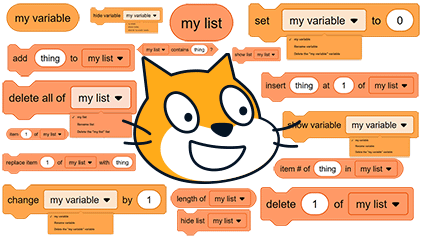
Show summary ▾ In Scratch, variables act like labeled boxes that hold different types of information, such as numbers or text, which can be used in different parts of your project. For example, in a game, you could use a variable to control the speed of characters without manually changing each one. To create a variable, go to the "Variables" tab and click "Make a Variable." It's like labeling your boxes, so pick a name that helps you remember what's inside. If the variable is for all Sprites, it will appear in each Sprite and the stage. But if it's for a specific Sprite, only that Sprite will have access to it. You can also make each clone of a Sprite have its own unique variable using the "For this Sprite only" block. To save variables across multiple accounts, like for a high score, you can use cloud variables. Set your variables at the start of your project using "Set Variable" or change them during gameplay with "Change by." You can show or hide variables on the stage and adjust how they look by double-clicking them. In addition to variables, Scratch also has lists, which are like collections of items. You can make a list for a specific Sprite or all Sprites. Lists are handy for things like keeping track of a player's inventory. You can add, insert, replace, or delete items from a list, and even check if a list contains a specific item. Lists can be displayed on the stage, and you can manually add, remove, or resize them. Plus, you can import or export text files to save your lists for later. Variables and lists are powerful tools in Scratch for storing and managing information in your projects.


